How I Built My Custom Blog With Astro and Headless Hashnode
Hello, I'm Furkan Emin Can.
I'm a self-taught, passionate front-end developer who enjoys writing TypeScript and strives to become a better developer.
In my free time, I love practicing calisthenics and enjoy reading programming blogs that help me improve my skills.
Hi everyone! In this article, I will share my journey of making my custom blog with Astro and Headless Hashnode in one week.
For a long time, I thought about making my blog with my stack, but I don't want to lose the beauties Hashnode offers us. When I saw the announcement on Headless Hashnode, I was fascinated. I thought that now was the time to build my custom blog.
I want to make it with Astro. Lately, I have seen the framework many times, and I've wondered about it. Also, at least, I should learn how to create queries in GraphQL. After these thoughts, I just postponed.
Once I saw Daniela Passos's tweet, I thought this was a great opportunity to overcome procrastination and take action immediately.
Before I start telling you about my journey, here are the links to the live preview and project repository:
Live Preview: https://headless-personal-blog.netlify.app
Project Repository: https://github.com/femincan/personal-blog
Planning and Preparation
For the blog, I will use these tools:
Astro: I will build the blog on top of this framework, and I am planning to use Solid.js for the interactive parts.
Tailwind CSS: I like utility classes and I will use the Daisy UI component library with it.
I've used Tailwind CSS and Daisy UI before, but this is my first time with Astro.
The official Astro tutorial is a great starting point. So I started with it and finished it in three days. I loved the tutorial, it helps you to quickly get used to Astro.
To be able to get the data, I need to use GraphQL queries and I've never used GraphQL before. Luckily, I don't need to create a GraphQL server from scratch, I just need to learn how to query an existing server.
Starting Development
After finishing the tutorial, I think I am ready to start developing the blog.
Setting Up the Project
To scaffold the project, I've used the official create-astro CLI.
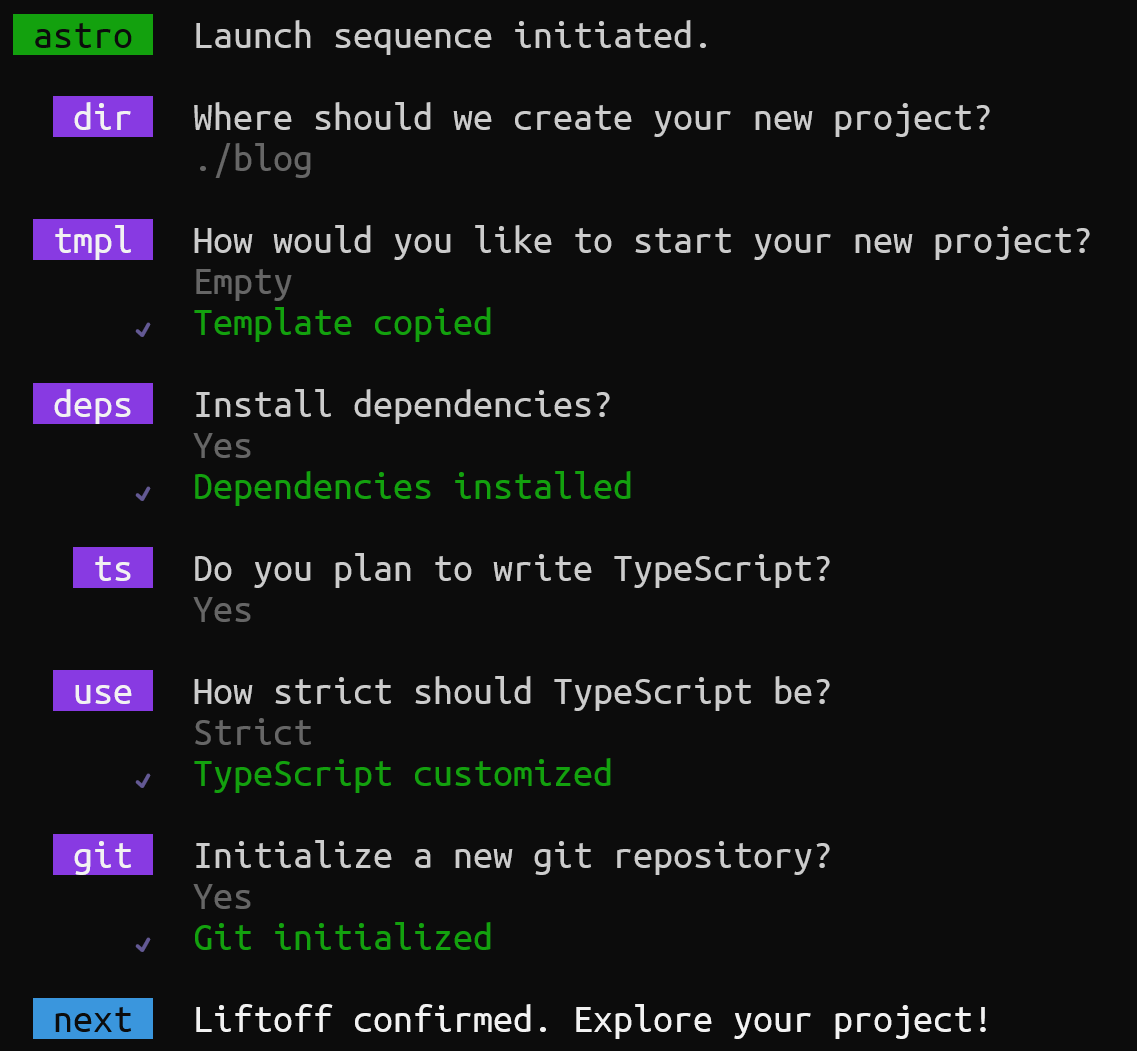
Let me explain the options I choose above:
I chose the name blog for the project folder. (After a while later, I changed it to personal-blog.)
I chose to create an empty Astro project. I want to build from scratch.
I prefer it installs the dependencies for me. (I've used pnpm as package manager.)
I chose to use TypeScript for the project with the recommended strict restriction options.
Setting Up Developer Productivity Tools
I like using ESLint and Prettier in my projects. Also Husky with lint-staged for linting the staged files before every commit.
In Astro setting up ESLint and Prettier was very easy. You only need to install eslint-plugin-astro for linting and prettier-plugin-astro for formatting. Then, just follow the instructions in their documentation.
Note: If you are using VSCode with ESLint and Prettier extensions, don't forget to insert the code below into your settings.json file to enable them to work with .astro files.
{
  "prettier.documentSelectors": ["**/*.astro"],
  "eslint.validate": ["astro"]
}
Creating Fetcher Functions
Before creating pages, I wrote four fetcher functions:
1. getBlogData: The function fetches the required information about the blog and the author.
2. getLatestPosts: The function fetches the information about the latest six posts.
When you fetch the first six posts the API already gives you to latest six posts, so I don't need to do additional processing on the returned posts.
3. getAllPosts: This function is a bit more complicated because I have to fetch all the blog posts in the blog to be able to generate static post pages with getStaticPaths function of Astro.
Hashnode API doesn't give you all the posts. The maximum limit is twenty posts per fetch. You can fetch two more properties alongside the posts: hasNextPage and endCursor.
So we can give endCursor to the after parameter in the next fetch to be able to fetch another at most twenty posts if hasNextPage property is true.
I used a while loop and fetched twenty posts in each iteration until the value of hasNextPage is false.
4. getAboutPageData: The function fetches the content of the static blog page in my blog.
Using GraphQL queries looks intuitive. But I can't say the same for the response. It looks cluttered. Even so, a bit of normalization fixes this issue.
Creating Base Layout
Astro lets you create shared layouts for pages. I used this feature to create a base layout. It is a wrapper for every page on the website.
It takes the current page information like title and description as props and uses them for Meta tags.
It starts with a Navbar component, the page content in the middle, and a Footer component at the bottom.
Creating Pages
Because the time is limited, I want to keep the number of pages low.
The website will consist of four pages:
/: Shows the information about the author and the list of latest blog posts./blog: Shows the list of all blog posts./blog/[slug]: Shows the blog post by the post slug./about: Shows the staticaboutpage of my blog.
1. The Home Page
The home page consists of two sections:
The author area
The latest blog post list
For the author area, I am fetching the data with getBlogData function and passed its author prop to AuthorArea component.
For the latest blog posts, fetched the six latest blog posts with getLatestPosts function and passed them to PostList component.
In the PostList component, I used Astro's Image component. I think having an Image component in a framework provides great development experience. Auto-optimized images, no cumulative layout shift, and so on.
With this I've done with the home page, Let's continue to the blog page.
2. The Blog Home Page
The page shows the list of all posts. I used getAllPosts function and showed the response using PostList component that I've used on the home page.
3. The Individual Blog Post's Page
The page uses the getStaticPaths function to generate all individual blog post pages.
For the content of the page, Astro doesn't support remote Markdown. This means I have to convert the markdown to HTML by myself.
I created the convertMarkdown function for this purpose and used:
remarkfor parsing markdown,rehypefor converting parsed markdown to HTML,highlight.jsfor code highlighting.
When converting markdown to HTML, I've encountered a problem because of the images in the fetched markdown.
The images in the fetched markdown look like the below:

There is an align property at the end of the link of the image. This property causes the images not to be parsed and converted correctly.
So, before parsing and converting the markdown, I wrote the code below to remove align properties from images.
const cleanedContent = content.replace(/\salign="\w*"(?=\))/g, '');
After finishing the function, I created a Markdown component that is responsible for displaying the markdown using @tailwindcss/typography plugin to show the converted markdown on the page.
After a few changes to its appearance, the post displayed nicely on the page.
4. The About Page
On the page, I fetched the content of about page in my blog with getAboutPageData function. Then, I used Markdown component again to show this content.
RSS Feed, Sitemap.xml, and Robots.txt
Astro has a great integration system. Most integrations are ready to use for your needs. For example, I added Tailwind CSS to my blog via a short astro add tailwindcss command.
With this system, I easily added:
RSS feed by using
@astrojs/rsspackage,generated
sitemap.xmlby using@astrojs/sitemappackage,and created
robots.txtby usingastro-robots-txtpackage.
After all this, I think the blog is ready to deploy.
Deployment
I chose Netlify for deploying the blog. After selecting the blog repo the blog was automatically built and deployed. Netlify also auto-deploys when new commits are pushed to the blog repo.
To keep the blog up to date, I used Netlify build hooks in combination with Hashnode webhooks. Netlify build hooks provide a URL, and making a POST request to this URL, triggers a website rebuild and deployment.
With Hashnode Webhook, when a post is published, updated, or deleted, Hashnode makes a POST request to this URL, triggering the blog to rebuild with fresh content.
That's all!
Conclusion
I am happy with Hashnode already for my blog. Additionally, the new Headless Hashnode fills the gap in the front-end customization side of a blog. Now you can use which stack you want for your blog.
My experience with Astro has been nearly flawless. I only faced some issues with TypeScript that the TypeScript Intellisense stopped working when I moved from .ts file to .astro file. But, compared to its good points, this problem is quite acceptable.
This challenge helped me to continue writing on my blog and overcome my procrastination. Thanks, Hashnode for that.
Feel free to specify your thoughts in the comments.
See you in the next one!